Recruiters read CVs in a predictable way. Top left first, then down through the most recent job, then a quick glance at education and skills. A CV that follows that path gets read properly. One that hides your latest role under a block of hobbies or a long list of school grades makes the reader work, and most will not bother.
This guide sets out the format for CV writing that most employers expect: which sections to include, the order to put them in, and what belongs inside each one. It also covers the exceptions, because a new graduate and a manager with twelve years behind them should not use exactly the same order.
By the end you will have a clear running order for your own CV, three worked layouts to copy, and a few template kits that already follow the structure, if you would rather fill in boxes than build from a blank page.
Quick picks: templates that follow the standard order
| Product | Best for | Price | Link |
|---|---|---|---|
| Marlowe Resume Kit | A guided layout with a writing playbook | $4.79 | View |
| Alder Resume Kit | Placeholder tips in every section | $4.79 | View |
| Wellspoken LinkedIn and Interview Workbook | Matching your LinkedIn profile to your CV | $6.99 | View |
The standard CV section order at a glance
For most people with some work history, this order works:
- Header: name, title line and contact details
- Profile, also called a personal statement or summary
- Work experience, most recent first
- Education and qualifications
- Skills
- Certifications, training and licences
- Optional extras: languages, volunteering, interests
- References, usually on a separate page
| Section | What goes in | Typical length |
|---|---|---|
| Header | Name, target job title, phone, email, town, one link | 3 to 5 lines |
| Profile | Who you are, one proof point, what you want next | 3 to 4 lines |
| Work experience | Job line and 3 to 5 result-led bullets per recent role | Half to two thirds of the CV |
| Education | Qualification, institution, year, relevant detail | 2 to 6 lines |
| Skills | Named tools, systems and hard skills | 2 to 4 lines |
| Certifications | Name, issuing body, year | 1 to 4 lines |
| Extras | Only items that support your application | 0 to 3 lines |
The logic is simple. The things a reader uses to decide go first. The things they use to confirm go after.
Header and contact details
Your name sits at the top in the largest type on the page. Directly beneath it, add a title line that names the job you are going for, such as “Logistics Coordinator” or “Registered Nurse, Paediatrics”. Then the contact line: mobile number, a plain professional email, your town or city, and a LinkedIn or portfolio link if it is current.
Leave out your full street address, date of birth, nationality and marital status unless the employer or country specifically expects them. In the UK and US they take up space and invite bias. Whether to add a photo depends a lot on the country, and our guide on a resume with a photo or without covers where each choice fits.
One practical point: keep contact details in the body of the page, not inside the document’s header area. Some screening software skips headers and footers entirely, which can leave a recruiter with your experience but no phone number.
Profile: the short pitch at the top
The profile is three or four lines that tell the reader who you are and why you fit. It is the bridge between your name and your experience, so it should point straight at the job.
Use three sentences. Who you are and how long you have done it. What you are good at, with one number. What you want next. For example, an accounts assistant might write: Accounts assistant with five years in purchase ledger for a manufacturer with 300 suppliers. Cut late supplier payments to almost none by setting up a weekly payment run. Looking for an accounts payable supervisor role.
Skip the generic adjectives. “Motivated, detail-oriented team player” could describe anyone. A number and a named task describe you.
Work experience: the heart of the CV
List jobs in reverse chronological order, newest first. Recruiters care most about what you are doing now, and this order puts it right under your profile.
How to format each role
Use one consistent job line for every role: job title in bold, then employer, town and dates. Something like Customer Service Team Leader, Northgate Energy, Leeds, Mar 2021 to Present. Keep the dates lined up on the right with a tab stop so the reader can scan your timeline in a second.
What to put under each role
Three to five bullets for recent roles and one or two for older ones. Each bullet should start with a verb and end with a result where possible. “Led a team of 8 handling 1,200 calls a week and lifted first-call resolution from 61% to 74%” tells the reader far more than “Responsible for a team”.
How far back to go
Ten to fifteen years is plenty for most applications. Anything older can sit in a single summary line, such as “Earlier roles in retail and hospitality, 2006 to 2010.” That keeps the timeline complete without spending half a page on it.
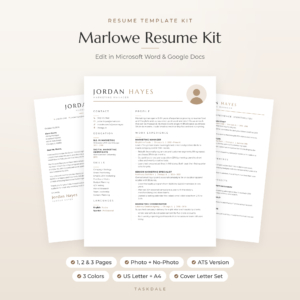
Marlowe Resume Kit
Price: $4.79 | Best for: anyone building a CV from scratch
Marlowe lays out every section in the standard order, with guided placeholder text you type over. It includes 1, 2 and 3 page resumes with and without a photo, an ATS version, plus a cover letter, references page and thank-you letter in Sand, Sage and Slate and both US Letter and A4. The 10-page Resume Playbook explains how recruiters read a CV and gives a profile formula and before-and-after bullets. Write your experience section first, since it is the longest and shapes everything else.
When education goes above experience
The standard order puts education after experience. Flip it in these situations:
- Recent graduates whose degree is their strongest selling point and whose work history is part-time or short.
- Career changers with a new qualification, such as an office manager who has just finished a project management certificate and is applying for project roles.
- Regulated professions where the qualification is the entry ticket: nursing, teaching, pharmacy, accountancy, law.
- Academic and research roles, where degrees, publications and grants usually lead.
Once you have three or more years of relevant work, move education back below experience. By then the reader cares more about what you have done than where you studied.
Inside the education section, list the highest qualification first. Include the qualification name, institution and year. Add grades or a dissertation title only if they are strong or relevant. School results can shrink to one line once you have a degree.
Skills, certifications and the optional extras
Skills
Make this a short list of named, checkable skills: software, systems, languages, licences, methods. “Sage 50, Excel pivot tables, VAT returns, Xero” is useful. “Communication, teamwork, problem solving” is not, because every applicant lists them. Show those soft skills through your bullets instead.
Certifications and training
Give each one a line with the name, the issuing body and the year. If a certificate is required for the job, such as a food hygiene certificate for a kitchen role or a forklift licence for a warehouse, consider moving it up into your profile too.
Languages, volunteering and interests
Include these when they add something. A second language for a customer-facing role, volunteering that shows leadership, an interest that links to the job. A line saying “reading, cinema, travel” adds nothing and can go.
Three section orders for three people
Here is how the order changes in practice.
The graduate
- Header and title line
- Profile
- Education, with relevant modules and final project
- Work experience, including part-time and placements
- Skills
- Volunteering and activities
The experienced applicant
- Header and title line
- Profile
- Key achievements, three bullets (optional, useful for two-page CVs)
- Work experience
- Education
- Skills and certifications
The career changer
- Header with the new target title
- Profile that explains the move in one line
- Relevant skills, grouped under two or three headings tied to the new job
- New qualification or training
- Work experience, with bullets chosen for their relevance to the new field
- Education
Notice that the header and profile never move. They are the constant. Everything below them shifts to put your strongest evidence second.
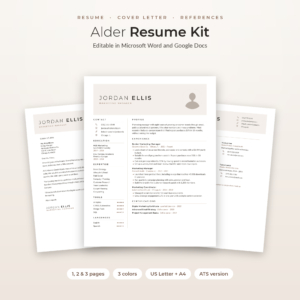
Alder Resume Kit
Price: $4.79 | Best for: people reordering sections for different jobs
Alder’s templates use real Word styles, so you can move whole sections up or down and the formatting comes with them. You get 1, 2 and 3 page resumes with a photo, a no-photo version and an ATS resume, plus a cover letter, references page and thank-you letter, in Mocha, Sage and Slate and both paper sizes. Each placeholder line is a short tip telling you what to write there. Decide which of the three orders above suits you, then rearrange the template to match before you type.
What goes on page two
If your CV runs to two pages, the order stays the same. The question is where the page break falls and what the reader finds when they turn over.
Aim to get your header, profile and at least your latest two roles onto page one. That way a reader who never turns the page still has your best evidence. Page two then picks up older roles, education, skills, certifications and any extras.
Put your name and page number in the footer of page two, in case the pages get separated after printing. Avoid breaking a role across the two pages, with the job line at the bottom of page one and its bullets on page two. If that happens, nudge the whole role over, or trim one bullet higher up so it fits.
One more tip for a two-pager: a short “Key achievements” block of three bullets just under the profile works well. It pulls your best results from across your career into the top half of page one, where a busy reader will definitely see them.
Where references fit
References usually do not belong on the CV itself. Most employers ask for them after an interview, and listing names and phone numbers on every CV you send shares your referees’ details far and wide. The line “References available on request” is also unnecessary, because employers assume it.
Instead, keep a separate references page ready in the same style as your CV, with two or three names, their job titles, how they know you, and their contact details. Our guide to the resume references page explains who to list and how to set it out.
Keeping your LinkedIn in the same order
Recruiters often open your LinkedIn profile straight after your CV. If your job titles, employers or dates differ between the two, it creates doubt. So once your CV order is settled, bring your profile into line.
Your LinkedIn headline plays the role of your title line. The About section plays the role of your profile, with a bit more room. Experience entries should match your CV’s dates and job titles exactly, even if the bullets there are shorter. It takes an hour and saves an awkward question later.
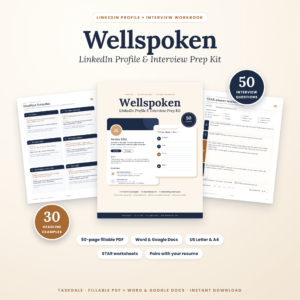
Wellspoken LinkedIn and Interview Workbook
Price: $6.99 | Best for: matching LinkedIn and CV, then interviews
Wellspoken starts with a fact check that lines up your CV and LinkedIn details, then gives you headline formulas, 30 example headlines, About section templates and experience bullet formulas. Part 2 is a fillable interview workbook with 50 common questions, STAR worksheets, research pages and thank-you emails. Use it as a 50-page fillable PDF or edit it in Word and Google Docs. Do the fact check the same evening you finish your CV.
Formatting rules that hold the order together
- Use standard headings. “Work Experience”, “Education” and “Skills” are what readers and screening software expect. “My Story” is not.
- Keep one date format. “Sep 2022 to Present” everywhere.
- Use the same job line pattern for every role.
- Leave clear space above each heading so sections are easy to find.
- Save as PDF unless the employer asks for Word.
Frequently asked questions
What is the correct order of sections in a CV?
For most applicants: header, profile, work experience, education, skills, certifications, then optional extras such as languages or volunteering. References go on a separate page.
Should education or experience come first on a CV?
Experience comes first once you have a few years of relevant work. Put education first if you are a recent graduate, changing career with a new qualification, or applying in a field where the qualification is required.
Do I need a personal statement on my CV?
A short profile of three or four lines is useful on most CVs. It tells the reader who you are and what you want before they reach your experience.
How far back should my work history go?
Usually ten to fifteen years. Older roles can be summarised in one line so the timeline is complete without taking up space.
Should I put hobbies on my CV?
Only if they support your application, such as coaching a youth team for a leadership role. Generic interests like reading or travel can be left out.
Where do certifications go on a CV?
In their own section after education or skills. If a certificate is essential for the job, mention it in your profile as well so the reader sees it early.
Your next step
Write the eight section headings on a sheet of paper in the order that suits you, using the three examples above as a guide. Then move your existing content under them. If you want a layout with that structure built in and tips in every box, open the Marlowe Resume Kit.