A printable junk journal kit looks great on screen. Then you hit print, and the pages come out bright, flat and a bit too perfect. Where’s the soft, worn, been-in-a-trunk look? Good news: that look is easy to add, and most of it costs nothing. A cup of tea and a bit of patience will do more than any fancy supply.
This guide covers the full printable junk journal process in order: printing, aging, cutting, binding and finishing. You’ll also see three Taskdale kits worth starting with.
Quick picks: printable junk journal kits
| Product | Best for | Price | Link |
|---|---|---|---|
| Rosewater Keepsake Junk Journal Kit | Vintage roses, tags and bookmarks on a budget | $0.79 | View |
| Attic Letters Printable Junk Journal Pages | Vintage lined and blank pages with cards and tags | $2.89 | View |
| Sage & Ember Autumn Junk Journal Kit | No-sew autumn spreads, ephemera, tags and pockets | $4.49 | View |
Printer settings for a printable junk journal
Good prep saves paper. Before you print the whole kit, run one test page and look at it in daylight, not just under your desk lamp.
Set the page size to match your file, either US Letter or A4. Choose “actual size” or “100 percent,” never “fit to page.” Pick the best quality setting you can afford on ink. Color-heavy papers with roses or fruit patterns drink ink, so drafts will look washed out. If your printer has a paper type option, choose plain paper for thin stock or matte for heavier stock.
Which files should you use?
Some kits give you several file types. The Rosewater kit lists PDF, JPG and PNG in its title. PDF is easiest for printing a whole stack at once. JPG and PNG are handy when you want to print a single tag or resize an element for a small pocket. PNG pieces with clear backgrounds let you layer things in an editing program, if you ever want to.
Single-sided or double-sided?
For a first book, print single-sided and glue two sheets back to back if you want a sturdy page. Double-sided printing is possible, but alignment slips on many home printers, and a crooked front-to-back match is annoying. Practice on scrap before you commit good pages.
How to age printable junk journal pages
This is the fun part. You’re making new paper look like it has a past. There are four easy ways, and you can mix them.
- Tea or coffee dipping. Brew something strong, let it cool, and brush it over the page or dab it with a sponge. Expect a warm brown tint.
- Inking the edges. Rub a stamp pad or an ink pad along the paper edge with a bit of sponge. It frames the page.
- Light sanding. Run sandpaper across the corners and edges for a worn look.
- Crumpling. Scrunch the paper into a ball, open it flat, and press. Instant soft creases.
Test any wet method on a spare sheet first. Inkjet ink can run when it gets wet, and that’s not always a nice surprise. Laser prints usually hold up better. If your printer is an inkjet, let the print dry for a full day before you touch it with tea, or spray the page lightly with a fixative made for paper.
A small warning about tea staining
Wet paper curls as it dries. Press it flat between two clean towels under a stack of heavy books. Leave it overnight. A page that dries on its own will warp, and a warped page is hard to bind. I learned that the hard way with a whole stack that looked like potato chips.
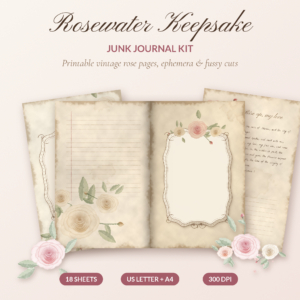
Rosewater Keepsake Junk Journal Kit
Price: $0.79 | Best for: a first printable junk journal with a vintage look
The title lists printable vintage rose journal pages, ephemera, tags, bookmarks and fussy cuts, in US Letter and A4 as PDF, JPG and PNG. The soft rose styling takes aging well, so tea staining and edge inking suit it nicely. It’s also the lowest-priced kit here, which makes it a stress-free place to practice.
Cutting and prepping your pieces
Once the pages are dry, sort them. Pages go in one pile, small pieces in another. For the small pieces, use a craft knife and a ruler if you want clean lines, or scissors if you like an uneven hand-cut edge. Tags, bookmarks and fussy cuts are the little extras that make the book feel finished.
Keep a small envelope marked “cut pieces.” You’d be surprised how many tags vanish into the carpet. Keep another for offcuts, because even tiny scraps make good ephemera for your next book.
Binding a printable junk journal without special tools
Binding scares people more than it should. There are three easy routes, and you can pick whichever matches your patience that day.
Route one: the pamphlet stitch
Fold your sheets in half and nest them. Punch three holes along the fold with a needle or an awl. Sew through the middle hole from the inside, go out the top hole, back in through the bottom hole, and finish at the middle. Tie off inside. It takes about ten minutes once you have done it once.
Route two: staples and a paper band
Staple along the fold two or three times, then cover the spine with a strip of fabric tape or a paper band. It’s quick, and it looks neat. It also suits kids who want to finish a book in one afternoon.
Route three: rings or a clip
Punch holes on the left edge and slip the pages onto rings. You can swap pages whenever you want, and the book lies flat. It’s ideal if your printable junk journal is still evolving and you aren’t ready to commit to a fixed order.
Covers that hold up
A flimsy cover makes the whole book feel flimsy. Thin card from a cereal box works. So does a folder cut to size. Glue a printed page over it, or paint the board first and add a title tag on top. Round the corners with scissors, since sharp corners wear down quickly in a bag.
If you want your cover to feel soft and old, wrap it with fabric or cover it with a tea-dyed page and edge it with ink. Add a ribbon or a loop of thread for a bookmark. Little finishing touches matter more than expensive materials.
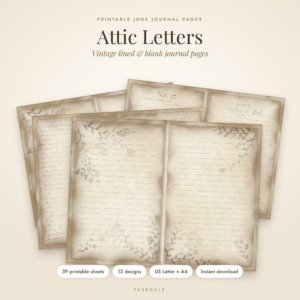
Attic Letters Printable Junk Journal Pages
Price: $2.89 | Best for: a vintage printable junk journal with lined and blank pages
The title lists 39 vintage lined and blank journal sheets with cards, tags and pockets, in US Letter and A4 as an instant download. Lined sheets take tea staining and edge inking well, and the blank ones are ready for glue and collage. A solid choice if you like the look of old letters.
Adding pockets, tags and flaps
Pockets turn a thin book into a keepsake. Fold the bottom third of a page up, glue the two side edges, and you have a pocket. Slip a tag inside so it peeks out the top. Add a flap by gluing one edge of a smaller sheet and letting it open like a door.
Spread these out. A pocket on every page makes a lumpy spine. One pocket every three or four pages keeps the book balanced and lets it close properly. Weigh down the glued parts with a heavy book while they dry.
Troubleshooting your printable junk journal
Things go wrong. Here are the common ones and the quick fix.
Colors look dull? Switch to a higher quality print setting and use brighter paper. Pages shrink? Check that scaling is off. Ink runs when you add tea? Wait longer before staining, or use a fixative spray on inkjet pages. Pages curl after gluing? You used too much glue, so apply a thin layer and press the sheets under weight. Stitching tears the paper? Use thicker folds or reinforce the spine with a strip of card.
None of these ruin the project. They’re just part of learning.
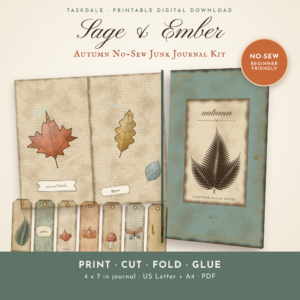
Sage & Ember Autumn Junk Journal Kit
Price: $4.49 | Best for: a no-sew printable junk journal in autumn colors
The title describes a printable no-sew fall junk journal with 16 journal spreads, 18 ephemera sheets, tags and pockets, as an instant download PDF. Because it needs no sewing, it is a friendly way to practice printing and aging before you try stitching a book.
Saving ink and paper as you go
Color printing adds up fast. A few habits keep the cost down. Print the pages you love most first and leave the rest on your computer. Use the draft setting for pieces you’ll tear, stain or cover with other things anyway, such as backing pages and the insides of pockets. Keep full quality for covers, tags and anything that will be on show.
Cut your sheets to size before you stain them, so you don’t waste a tea bath on paper that will end up in the bin. And keep a folder of failed prints. A smudged page makes a perfectly good backing sheet or a strip for a spine band. Nothing in a junk journal has to go to waste, which is sort of the point of the craft.
Keeping the finished book in good shape
Once it’s done, store the book flat or standing upright with a bit of space around it. Avoid damp rooms, since stained paper and glue both react to moisture. Slip a loose ribbon or a spare tag through the spine so the book doesn’t bulge when you tuck in extras. If it gets too fat to close, take a pocket or two out. Your future self will thank you.
Comparing the three kits
| Product | Format | Price | Best for | Link |
|---|---|---|---|---|
| Rosewater Keepsake Junk Journal Kit | US Letter and A4, PDF, JPG, PNG | $0.79 | Vintage rose pages, tags, bookmarks, fussy cuts | View |
| Attic Letters Printable Junk Journal Pages | 39 printable sheets, US Letter and A4 | $2.89 | Vintage letters, lined and blank pages | View |
| Sage & Ember Autumn Junk Journal Kit | Printable no-sew kit, PDF | $4.49 | Autumn spreads, ephemera, tags, pockets | View |
Frequently asked questions
What paper is best for a printable junk journal?
Plain printer paper works for most pages and is cheap for practice. Slightly heavier paper handles glue, tea and stitching better, so use it for covers and pockets. Check that your printer can take the weight, and always run a test page before printing a full set of colorful pages.
How do I make printed pages look old?
Try tea or coffee staining, edge inking, light sanding and crumpling. Test on a spare sheet first, especially with inkjet prints, which can run when wet. Press stained pages flat under heavy books overnight so they don’t curl, then trim any uneven edges once everything is fully dry.
Can I print a junk journal on an inkjet printer?
Yes. Just let the ink dry fully, ideally for a day, before staining or gluing. A paper fixative spray can help stop smudging. Use the best quality setting for colorful pages, and keep a test sheet nearby to check how each aging method behaves.
How many sheets do I need for a first book?
Eight to ten folded sheets make a comfortable first book. That gives you space for pockets and tags without making the spine bulky. If your kit has more pages than that, save the rest for a second journal and enjoy a quick first finish.
Do I need to sew the pages together?
No. You can staple the fold and cover it with tape, or use rings or a clip so pages stay swappable. Sewing gives a classic look, but it’s optional. Choose the method you will actually finish, because a bound book beats a perfect plan.
Your next step
So, the short version: test print, age gently, press flat, then bind simply. For a cheap place to practice, open the Rosewater Keepsake Junk Journal Kit, print one test page, and brew a mug of tea you won’t drink. If you want autumn colors, the Sage & Ember Autumn Junk Journal Kit is waiting, and the Attic Letters Printable Junk Journal Pages suit a vintage letter look.